
Galleries are best viewed with a resolution of 1024x768 pixels. All images copyright © All rights reserved
Photography Tools |
||
Film vs DigitalUntil 2007 I used film for almost all my photography. This is mainly because of my original investment in film cameras, lenses and darkroom equipment. I decided to buy a digital SLR in June 2007 after comparing images taken using my standard 35mm colour negative film with similar images taken using a Canon 12Mpx DSLR (see below). The digital results were far superior - mainly because of the absence of film grain and dust. Since all my existing lenses are Nikon, a Nikon DSLR was the only real choice. Eventually, I decided on the 10Mpx D200. The 12Mpx D2X was too expensive at about twice the price. The 12Mpx D300, the D3 and the D700 with it's full-frame sensor were not available when I made the switch to digital. The DX sensor on the D200 meant I had to buy a couple of extra zoom lenses to cover wide angle. The advantages of a digital camera over film are well documented:-
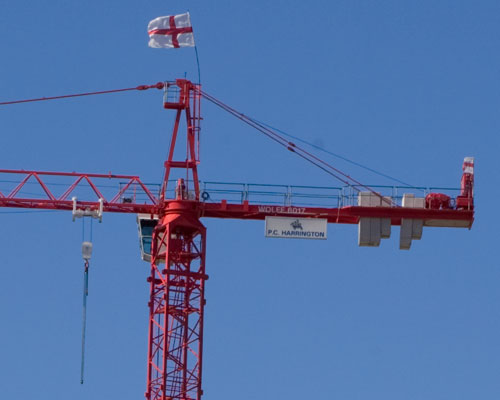
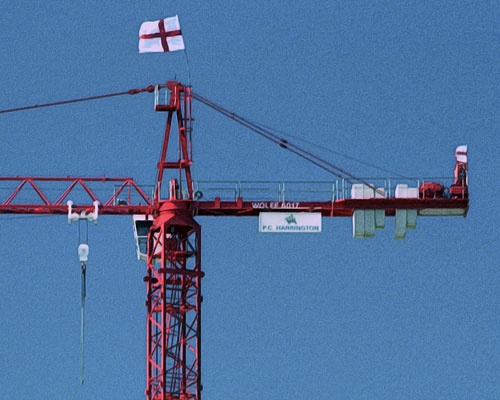
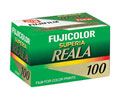
For my comparison between scanned 35mm film and the Canon 12Mpx DSLR, I used my usual colour negative film - Fuji Reala ISO 100. The subject was a group of red tower cranes against a plain blue sky. This was an ideal subject to show up deficiencies such as grain and sharpness. I used a Nikon F100 + Nikon 80-200 AF ED f2.8 zoom for the film image. The digital image was taken using a 12.7Mpx Canon EOS 5D. The original full frame images were about the same size and composition. A 500 px x 400 px section was taken from the digital camera image. A corresponding section of the negative was scanned using my Epson 4870 scanner. I tried to match the colour balance and saturation for the two images as best I could - although there is a noticeable red cast in highlights of the image from the scanned film. Also the white highlights appear brighter in the scanned film image.
The results speak for themselves - the digital image looks considerably cleaner and sharper. The flat tone of the sky really shows up the film grain - despite an attempt to reduce it by applying some noise reduction in Photoshop. The metalwork of the cranes shows up sharpness and resolution defects - some of which may be attributed to the lens and scanner, although my lens tests show the Nikon 80-200 lens to be very sharp. Despite my switch to digital, I can still achieve better resolution than many digital cameras by using medium format film and a scanner. A medium format 6x4.5 negative has an equivalent resolution to a 50 Megapixel digital camera. However, film grain can still sometimes be noticeable on a 12x16 print - particularly in flat tone areas such as skies. Large FormatI have always wanted to try my hand at large format. I would love an Ebony 45S or 45SU, but even used Ebony cameras and lenses are very expensive. I don't have the darkroom space for a 5" x 4" Enlarger, so I would need to spend a lot of money on a good quality scanner and large format (A2+) printer. Large format printers use a lot of ink and are expensive to run. There doesn't seem much point in investing in large format and only making A3 size prints. Perhaps when I win the lottery? FilmThese days, I rarely use 35mm film, although I do still use 120 roll film for medium format. For reasons of consistency, as well as simplifying film development and colour calibration when printing, I restricted myself to just a few types of film.
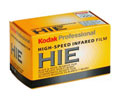
Update: Kodak HIE 35mm film was discontinued in 2007. Fuji Reala 35mm and 120 film was discontinued in 2012/2013. I still have a few rolls in the fridge. I sometimes did use other film types. I used FP4 before Ilford Delta became available. I used Ilford HP5 if I wanted to push process for high contrast. Although it's not been available for some time, Kodak Technical Pan was excellent for high resolution, very fine grain 35mm film work. Agfa pan 25 had very fine grain but is also no longer available. I still have a few rolls in the fridge although it may be so out of date that it is no longer be useable. Like Technical Pan, the slow speed limits it's usefulness. When I started photography, I often used to find my B & W negatives looked thin and lacked shadow detail. After learning the zone system, I carried out my own exposure and development tests. Since then I rate most B & W films below their published speed. For example I rated Delta 100 at 80ASA, FP4 125 at 100 ASA. Film ProcessingC41 Colour negative and E6 Transparency film were usually sent to a lab for processing. I used to process these films myself but it's time consuming and temperature control is critical. I used to use Colab but switched to Peak Imaging after having problems with scratches on 35mm negatives. I always make my own prints and never use a lab. I still develop B&W films myself. I usually use ID11 (or Kodak D76). I use stock solution for Kodak HIE and a dilution of 1+1 for Delta 100 or 400. Using diluted developer results in improved acutance. During the last couple of years I have been making up the formula for ID11 using raw chemicals. This works out cheaper than buying the 1L Ilford packs. Microphen is better for push processing. I have also used Agfa Rodinal. Living in a hard water area, I used to have problems with drying marks. These can be especially noticeable in flat tone areas such as skies. I now dunk the film in purified water with a few drops of wetting agent (Ilfotol) for about a minute after the final wash. I'm still unsure whether it's best to use a squeegee to remove the water before hanging up the film to dry. This can lead to scratches unless you are extremely carefull. One option that seems to work is to first remove the rubber blades from the plastic tongues. Hang the film up using a film clip and then slide one of the blades very gently down each side of the film to remove the water. Infra-RedUntil fairly recently, Infra-red was one area of photography that had not been completely taken over by digital cameras. Monochrome infrared can produce dramatic results that look quite different from reality. Sunlit foliage and grass appear almost white, blue skies appear black. Spring is the best time of year for infra-red photography - the new leaves reflect more infra-red. Shadows tend to be much more obvious than with conventional film and should be taken into account in the composition. I recommend the book 'Infra-Red Photography' by Hugh Milsom. I still have a few rolls of 35mm Kodak High Speed Infra-red film (HIE). Unfortunately, Kodak stopped manufacturing this film in 2007. I bought several rolls from Speedgraphic just before it disappeared and now have them stored in a freezer. You can still sometimes find a few rolls of outdated film for sale on eBay but it is now very expensive. Kodak HIE has loads of grain which can often enhance an image. I have found that the grain becomes worse on out of date film. The lack of an anti-halation layer in the film gives a characteristic luminous halo effect where light areas meet dark. The film must be loaded and unloaded in complete darkness. This means taking a changing bag with you.
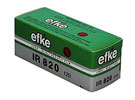
After Kodak HIE became unavailable, I experimented with 120 Efke IR820 'Aura' film. It is much slower than Kodak HIE (by about 5 stops). My tests indicate a shutter speed of around 1/2sec->1sec @ f11 with a Hoya R72 filter in bright sun. Like Kodak HIE, the 'Aura' variant has no anti-halation layer and gives the same characteristic luminous glow around highlights. The increase in negative size over 35mm Kodak HIE combined with the slower speed gives less grain and more detail.
Efke IR820 was a good alternative to Kodak HIE, but it was unfortunately discontinued around 2012. The only infrared film remaining in 2014 is Rollei Infrared 400. This is available in 35mm and 120 roll film formats.
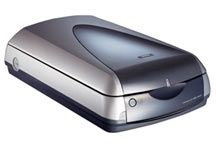
To get the most dramatic infra-red effects, a filter is required. A standard 25A red filter can be used but for the full effect, a proper infra-red filter is needed. I use a Hoya R72. This is totally opaque to visible light, so the image must be composed and focused before the filter is attached. A tripod is essential. Since infra-red radiation has a longer wavelength than visible light, the focus position needs to be adjusted. Hence auto-focus is useless for this type of film. My old MF lenses have a red dot on the barrel to indicate the infra-red focus position. The sensors in most light meters will not give a correct reading with infra-red. I usually guess the exposure based on the published information and bracket -1, +1, +2 stops. On a sunny day you normally need about 1/60sec at f16 when using Kodak HIE. I develop the film in stock ID11 or D76. Kodak changed their recommended development time from 11 min to 8.5 min at 20 degC some time ago. I have also found that 11min produces excessive contrast. I used to use 10min as a compromise but now use 9 minutes. It is possible to have a digital SLR converted to remove the manufacturer's normal IR blocking filter from the sensor and replace it with one that blocks visible light instead. This means you need to buy a second digital SLR camera body dedicated just for IR. So far I have only seen this service advertised by a couple of companies based in the USA. See LifePixel.com. Perhaps there is a business opportunity for a company here in the UK? The big advantage of having the visible light blocking filter over the sensor rather than the lens, is that you can still view the image through the lens when you press the shutter. A digital camera that supports live-view offers a big advantage as you can actually see the infra red effect. You can buy the replacement filter and fit it yourself, but you really need the right tools and a completely dust free area. Unless you know what you are doing there is a risk that you could damage the camera. As part of the conversion, you can also have the auto-focus adjusted to suit infrared. Digital infrared means you get a grain free image and you don't have to worry about fogging when changing film. ScanningI use an Epson 4870 flatbed scanner for film scanning.
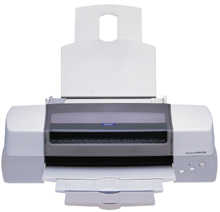
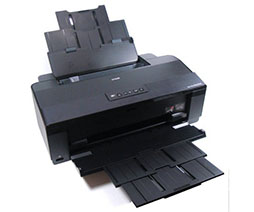
I chose a flatbed scanner rather than a dedicated 35mm film scanner because it can also scan medium format. Dedicated film scanners that can handle both formats tend to be much more expensive. The results for scanned 35mm film are good enough for A4 size prints. Scanned 6x4.5 medium format film gives good results printed on A3. The scanner comes with a cut down version of Lasersoft's Silverfast scanning software which I later upgraded to the full AI version. Digital PrintingFor printing digital images I originally used an Epson 1290 ink jet. This is an A3 printer that uses 5 colour + 1 black dye based inks. Dye based inks generally produce more vivid colours than pigment inks, especially when used on glossy paper. However, dye based inks do tend to fade in sunlight, so they are not so good for archival prints. Dye based inks do have the advantage that they tend not clog print heads as easily as pigment inks. This is because pigment inks are made from small particles held in suspension. The single black ink means the Epson 1290 is not so good for monochrome printing. After some years of use, the printer reached the maximum number of head cleaning cycles allowed before the internal waste ink pad becomes saturated. Although it's not difficult to reset the counter, replacing the waste ink pad is not an easy job. Instead I decided to fit an OctoInkjet external waste ink tank kit. This is simply a matter of removing the printer external cover and attaching a plastic tube to the internal waste ink pipe. The waste ink is fed to a small external plastic container. The Epson 1290 lasted over 14 years but eventially the cyan channel in the print head developed nozzle-outs. I tried all the usual head cleaning methods: Injecting Isopropyly alcohol into the head using a syringe etc. Nothing seemed to work. Eventually I resorted to removing the print head. By photographing the head using a macro lens while forcing de-ionised water through the nozzles, I could see no obvious signs of blockages. I assume that some of the cyan piezo elements within the head must have failed. In 2016 I replaced the Epson 1290 with an Epson 1500W. This is an A3 printer that also uses 5 colour + 1 black dye based inks. It has wireless which makes it easier to print from a laptop. I decided against the more expensive A3 photo printers such as the SC-P600 because of the cost of replacing the nine ink cartridges. Like the 1290, the 1500W only has a single black ink, so is not so good for monochrome prints. The 1500W is OK and does the job, but some of the plastic components (e.g. the paper trays and door) are more flimsy compared with the 1290. It also suffers from occasional paper misfeeds - a problem I never experienced on the 1290. I don't make prints from digital images that often these days because of the cost of ink and photo quality paper. Also, prints need to be mounted and framed or stored somewhere.
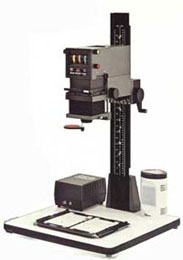
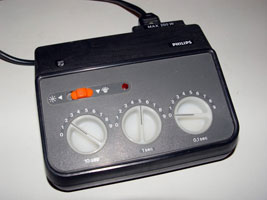
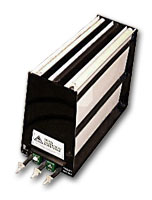
Darkroom PrintingEnlargersDurst M305 EnlargerIn the early days I used a Durst M305 with a colour mixing head for printing from 35mm negatives. This served me well until I bought a medium format camera. The enlarger was fitted with a Hoya 50mm lens.
The Durst M305 used a separate timer and exposure meter manufactured by Phillips. It did not have a colour analyser.
I could use the Lab Attachment on my Gossen Lunasix III light meter to measure the contrast range on a B & W negative and work out the filtration to use with multigrade papers. Durst Modular 70 (M70) EnlargerAfter buying a medium format camera system, I upgraded to a Durst Modular 70 enlarger with a colour mixing head. This is fitted with an electronic 'Micro' head which has a built in timer and colour analyser. The enlarger can handle 35mm and 120 film up to 6 x 7cm and can be used for colour and B&W fixed grade or multigrade papers.
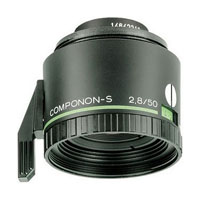
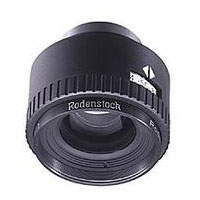
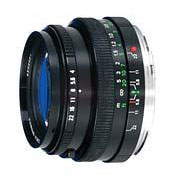
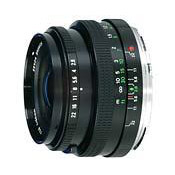
The enlarger does not come with a stabilised lamp power supply as standard although a stabiliser card can be bought as a separate item. The stabiliser prevents colour and density changes if the mains supply voltage varies. After talking to a Durst training representative, I bought and installed a stabiliser card to avoid these problems. I have only had to replace the lamp once since I first bought the enlarger. The lamps are specially selected by Durst and are now difficult to obtain. Luckily I have another two spares. The enlarger mechanics are well built and solid. Coarse height adjustment is made by sliding the spring loaded head up and down. The head can then be locked in position and fine adjustments made using a separate knob. The negative carrier is well made using alloy rather than plastic. It has sliding pins to handle both 35mm and 120 size negatives. Keeping negatives flat in the carrier can be a problem - particularly with 120 size film. If the negative is not flat, then part of the image can be out of focus. I bought a pair of glass negative carriers to help avoid this problem. One of these is made from special anti-newton glass. I usually find that a single glass above the negative is sufficient to keep it flat. I found that stray light from the sides of the neg carrier and/or the Micro head LED display can cause problems. After the eyes have grown accustomed to being in the dark for several minutes, there is enough stray light from the LEDs to make out shapes in the darkroom. I can even use the light from the LEDs to identify the emulsion side of colour paper. I reduced the brightness the LEDs by fixing a piece of light-blue coloured acetate film over the display using double sided tape. For a straight print and normal exposure times, the light is usually insufficient to give noticeable fogging although I sometimes wonder if it can still give rise to a slight colour cast. When burning-in is required, the enlarger lamp is on for longer. On a colour print, the stray light can give a cyan cast and a flat looking print with dull highlights. This can happen despite having a large piece of black card formed into an 'L' shape around the back and one side of the enlarger to avoid reflected light from the walls. It took me some time to identify the cause. Once I realised what was happening, I made a cover box from black card that fits around the negative carrier to cut out the stray light. The cover has to be wide enough to accommodate a negative strip of four medium format frames or six 35mm frames. Modular 70 Micro Memory ModuleThe Micro head has separate calibration channels for film and paper. Each channel stores the Density, Cyan, Yellow, Magenta calibration values. Calibration is complex and time consuming, so I tend to stick to the same film, paper and chemistry. The Micro head is very complex to use and takes a lot of getting used to: The user interface is particularly bad. I guess it was designed before cheap embedded microcomputers and LCD displays were available. The instruction manual is poor and very confusing. It lists the steps required to carry out a procedure in terms of the sequence of buttons to press but it does not explain why and what is actually going on internally. An analogue block or mimic diagram of the internal computational logic would make things easier to understand. The display only has numeric 7 segment LEDs to indicate filter and calibration values. There is no text display to guide the user through the process steps required. The buttons are multi-function and often require 2, 3 or even 4 buttons to be pressed at the same time. This can be quite tricky in the dark! Enlarger LensesI have two enlarger lenses:- A 50mm f2.8 Scheinder Componon-S for 35mm and an f4 80mm Rodenstock Rodagon for Medium Format.
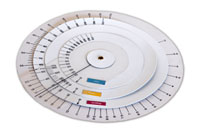
The Schneider Componon-S lenses are 6-element, 4-group lenses corrected for a flat field, high-contrast transfer, and excellent definition over the whole field. The aperture ring has a linear f-stop scale with click stops at full and half steps. Componon-S lenses are fitted in a barrel mount with a luminous aperture scale, click stops which can be disengaged and a preset aperture control. With this system the iris can be opened after stopping down to the desired aperture for final cropping adjustment or fine focusing. A lever then returns the iris to the previously selected working aperture shown on the luminous scale. The Rodenstock Rodagon uses a six-element design with astigmatism correction. Aperture range f4-f22 with disengageable click-stops, magnification 2x-10x (optimum 6x), mount size 39mm, filter size 40.5mm Enlarger AccessoriesA very useful device is the Enlarger Filter Calculator disc. This is homemade and allows me adjust the exposure time to give the same print density after changing any of the colour filters in the enlarger. It also allows me to easily translate between time and aperture in 'stops'.
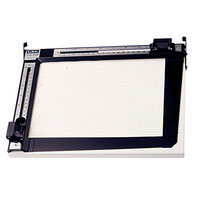
EaselsI have two easel masks: both manufactured by LPL. They are the two blade type and relatively inexpensive compared to four blades easels from Beard or Saunders. LPL easels are reasonably sturdy and accurate. The smaller 11" x 14" was originally bought for use with the M305 35mm enlarger. I later bought a larger 14" x 17" easel to use with the M70 enlarger when printing medium format negatives. I usually use a standard 12" x 16" print size for medium format. This allows me to use the same size matt and frame for most of my prints.
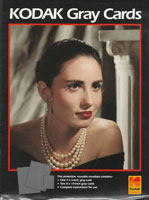
Colour Filtration CalibrationThe big problem with colour printing is finding the correct enlarger colour filtration. It can take up a lot of time making test prints and calibration strips and a lot of wasted sheets of paper. Even after the optimum filtration has been found for a given batch of paper, the colour balance will usually drift from one day to the next as the chemistry changes and oxidises. This can happen even when replenishing the chemistry at the specified rate. I use a Kodak 18% gray card in conjunction with the Durst Test Print Analyser or a reflection densitometer to calibrate the enlarger filtration for each type of colour film I use. I try and shoot an image of the gray card on each batch of negatives before I send them to the lab for processing. Ideally the gray card should be shot under the same lighting conditions as the subject i.e. the same time and place, although this is not always practical.
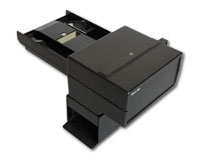
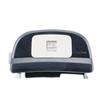
I usually have to increase the exposure from the gray card calibration value by between 1/4 and 1/2 stop to get a good looking RA-4 colour print. If I use the calibrated gray card exposure, colour prints often look washed out. The exposure increase improves the colour saturation in the highlights. Test Print AnalyserThe electronic enlarger head for the M70 has provision for a Test Print Analyser (TPA).
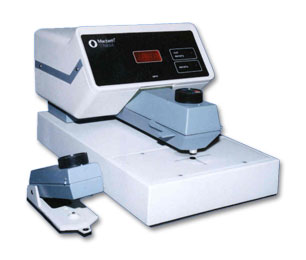
The TPA is very useful for calibrating and correcting casts when making colour prints. It allows light reflected from a small test print made from a negative of a standard 18% gray card to be compared against light reflected from a reference card. The filter controls can then be adjusted to correct for any colour cast once the exposure has been calibrated for the correct density. The TPA slots into the enlarger in place of the negative carrier. The print sample and reference card are inserted into a slide. The colour analyser probe fits into a slot in the TPA and receives light from the enlarger head reflected from the surface of the sample via a mirror. The electronic head displays the difference both in density and colour (Cyan, Yellow, Magenta) between the sample and the reference. The exposure and filter controls are then adjusted until the display indicates zero. The process may need to be repeated 3 or 4 times to achieve the correct density neutral gray print but it's still easier than trying to assess a colour cast by eye. The human eye is good at detecting colour casts but it is not good at identifying what the cast is. For example, I find it difficult to tell the difference between a slight magenta cast and a red cast or between a slight cyan cast and a blue cast. The ambient lighting used to view the print makes a big difference as does the background. Attempting to make adjustments to the colour balance at night using ordinary domestic tungsten lighting is hopeless. The TPA overcomes these problems - at least to some extent. You can only calibrate the filtration and remove the colour cast for a particular print density. With the RA-4 paper I normally use, I find that if you adjust the filtration for a neutral gray print from an image of an 18% gray card, then lighter areas may have a slight magenta cast while darker areas may have a green cast. This is down to the film and paper characteristics. With darkroom printing there is not much you can do to overcome this problem. The effect only slight and it's not normally noticeable with most images that have a mix of dark and light tones. With digital printing you can apply correction curves over the entire tonal range. DensitometerI have a used Macbeth TR-924 densitometer, bought for just £14. This model is capable of making both transmissive and reflective density measurements. I bought it mainly to help determine colour casts on test patches when colour printing. I have found the Test Print Analyser I use with my Durst M70 is not really accurate enough.
The TR-924 has been around since the 1980's but is industrial quality and very solid (die-cast aluminium base). They are now obsolete and so replacement components and lamps are difficult to obtain. The one I bought had some faults in the power supply but luckily the lamps were ok and I was able to repair my unit using substitute components. I calibrate the reflection probe using a Dupont gray scale and colour patches. A Kodak gray 18% card is used to double check: it should give density readings of 0.745 for all colour channels. I calibrate the densitometer in transmission mode using a GAF contact exposure guide. This is a strip of film containing various test targets including a hard dot scale with percentages of: 5,10,20,30,40,50,60,70,80,90 and 95% of area coverage. A chart supplied with the exposure guide indicates the equivalent density readings. The odd thing about using the densitometer is that I can measure the reflected light from a Kodak gray card and get the expected values of R=0.74, G=0.74, B=0.74. However, when I adjust the enlarger filtration such that my test print gives the same readings, I detect a slight yellow/green cast when I compare the two visually in daylight. To get a good visual match, I have to reduce the density of the blue channel to around 0.72. This is unlikely to be a densitometer calibration issue because I am only using it as a comparator; I am not relying on the absolute values. The only explanation I can think of is that it is an effect caused by the reflection characteristics of the colour paper (semi-matt) compared to the matt gray card. An unexpected effect I have discovered by using the densitometer is that even after calibrating the enlarger filtration using a gray card, I can still end up with a significant colour cast when printing a different frame on the same roll shot on a different day. A recent example is a shot of a woodland scene in autumn: There is a yellow bias in the scene because of the colour of the leaves. Measurement using the enlarger colour analyser with a diffuser under the lens confirms this (Y=-10). If I print the scene using the calibrated filtration settings from the gray card, the result is far too yellow and looks completely wrong. To get the print colour balance to look right, I have to adjust the filtration so that the color analyser indicates Y=0 i.e. an overall neutral colour. I assume this is down to the colour temperature of the ambient light. The gray card was shot on a dull overcast day whereas the autumn scene was shot on a bright day. Ideally the gray card should be shot under the same lighting conditions as the subject. Colour PrintingI use two thermostatically controlled 12" x 16" three-slot Nova tanks for processing silver prints. One is used for RA-4 colour paper, the other for B&W.
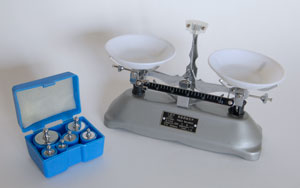
For RA-4 printing I originally used Fuji Crystal Archive paper and Tetenal or Nova chemistry at 35deg C. Unfortunately, Fuji Crystal Archive paper is no longer available in cut sheet form. Hence I now use Kodak Supra Endura which is the only alternative I can find. I rarely make chemical prints from transparencies these days. This really needs a four slot deep tank. In the past I've used Cibachrome (Ilfochrome) and a rotary drum. I always found excessive contrast to be a problem with Ilfochrome. It's much more convenient to scan colour images and use an inkjet printer. Monochrome PrintingThe Modular 70 with the colour mixing head and Micro adaptor also supports monochrome printing using multigrade paper. This is not as convenient as a dedicated Multigrade enlarger head that automatically compensates for exposure as the filter settings are adjusted for each grade. Instead you use stored exposure calibration settings and a combination of Cyan and Magenta filters for each grade. The electronic head has several separate paper calibration channels for different paper types. Although I normally use the deep slot Nova tank, I sometimes still use trays for B&W. Trays are essential for lith printing. I use fixed grade Kentmere Kentona paper for lith prints. For conventional B&W silver prints I normally use Ilford Multigrade paper - either resin coated (gloss or pearl) or fibre. For B&W processing I use Ilford Multigrade Developer and Ilford Rapid Fixer at room temperature. I prefer to use a traditional Acetic Acid stop bath. The newer odorless Ilford IN1 stop bath does not keep well once diluted to working strength. IN1 uses Citric Acid. This ends up with a brown scum if left in the Nova tank for a few weeks. ToningI often tone my B&W silver prints. For the last couple of years I have been making up my own toning solutions using raw chemicals. Tim Rudman's 'The Master Photographer's Toning Book' contains a number of different formulae. I have experimented with Sepia, Copper and Blue toners. I've stopped using blue toner since I discovered some of my old toned prints deteriorated after just a couple of years. They ended up an odd looking blue-green colour. I almost always use Selenium to enhance my best prints - it makes the blacks appear richer and improves the archival properties. Darkroom ChemistryI sometimes make up my own developers and toners from raw chemicals. For this I use a simple chemical balance originally bought from Rayco (sadly no longer in business). The formulae for many well known developers and toners can be found on the internet. Although Rayco stopped trading some time ago, Silverprint supply a range of raw photographic chemicals.
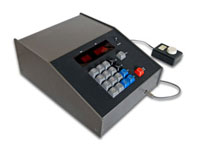
Process TimerI use a home built microprocessor controlled process timer for processing prints in the darkroom. It has a built in relay that can be used to control an enlarger, although I never use this as the Micro head on my Durst enlarger has timer a built in.
The timer displays minutes and seconds and has a display resolution of 0.1 second. The timer can store and recall up to 10 preset time intervals. The time entered on the unit or recalled from a store counts down when the start/stop button is pressed. As the time approaches zero, the timer emits a series of audible beeps rather like the greenwich time signal broadcast by the BBC. This can be used as an indication to begin pouring developer etc. Once the time has reached zero, the timer continues to run, but counts up. The remote stop/start button can be used to easily cycle between the stored times for a number of separate processes. For example, when developing film or paper, separate times can be stored for development, stop and fix. This is especially useful for E6 slide film where up to 6 different chemical baths are be required. Pressing the remote button the first time recalls the time interval from store 0 and starts the timer. Pressing the button a second time stops the timer and recalls the preset time from the next store in the sequence. Pressing the button a third time starts the timer again. This can be repeated to cycle through each of the 10 stored time intervals. The remote stop/start button has a luminous patch for use in the darkroom. When developing film I usually use a simple clockwork darkroom timer which needs no power supply.
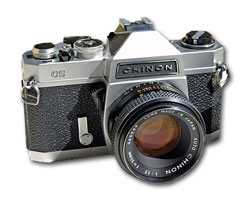
35mm Film SLR CamerasMy first 35mm SLR camera was bought in the seventies when I was still at school: A second-hand Chinon CS with a 50mm f1.7 lens. It was simple to use and built like a tank. The instruction manual is still available online here. I eventually sold the Chinon and upgraded to a Nikon. I have remained faithful to Nikon's 35mm cameras and lenses ever since.
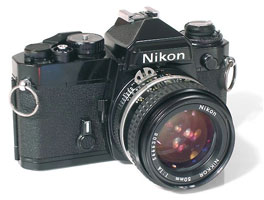
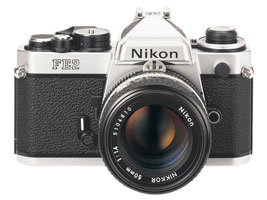
I now own three 35mm film Nikon bodies, all of which get little use these days:-
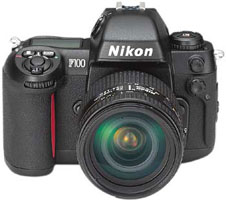
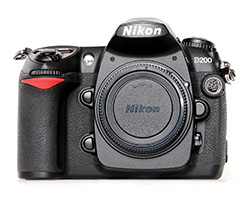
The Nikons are very solid, easy to use cameras. The older Nikon FE is now used exclusively for infra-red film. The Nikon FE2 is used for black & white film. Both cameras are old but still work well. The FE2 suffered a broken self timer lever a while ago and was repaired by Grays of Westminster. I rarely use the self timer, but pushing the lever the other way shuts down the lens for depth of field preview. They replaced the felt light trap at the same time. I replaced the light seal in the FE after a roll of infra-red film became fogged due to light leakage. I used the Nikon F100 mainly for colour film, although since buying the digital D200, it now spends most of it's time gathering dust. The matrix and spot metering options on this camera are much better than the simple average metering system on the FE and FE2. I rarely use auto-focus - most of my old Nikon lenses are manual focus in any case. After having used cameras with manual film advance for so long, I found the motorised film advance on the F100 to be very useful for macro work. There is less chance of disturbing an insect when you don't have to move your hand to operate a film advance lever. The one thing I dislike on the F100 is the positioning of the socket for the electronic remote cable release. It can be very fiddly to attach the cable - especially in cold weather when you are wearing gloves. It's a shame Nikon did not incorporate an infra-red or wireless remote shutter release. Digital SLR CamerasNikon D200My first digital SLR was the Nikon D200. Although the resolution of the 10Mpix DX sensor is low by todays standards, it is usually good enough for 12"x16" prints.
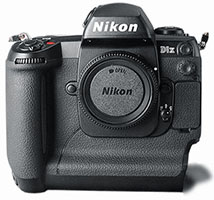
The Nikon D200 took over from film for most of my '35mm' work - although I continued to use 35mm infra-red film for some time. In January 2019 I bought a second used D200 body that had been converted to infrared by Advanced Camera Services. This has a 720nm filter fitted over the sensor. The filter is a good compromise between loss of sharpness caused by chromatic abberation while retaining a certain amount of false colour that can be used when converting to monochrome during post processing. Although the D200 is not ideal for infrared as it has no live view, it does mean I can use my existing lenses, batteries, cabble release CF cards and other accessories. Nikon D1xIn December 2018 I was given a 6MP D1x body that had been converted to infrared by Life Pixel. The sensor was fitted with a 590nm filter which gives images a yellow-orange false colour appearance. One disadvantage of a 590nm filter is that, depending on the lens, images can appear less sharp because of chromatic abberation in the infrared. Lenses are usually designed to cancel out chromatic abberation only in the visible part of the spectrum. The camera was in good condition but had what initially appeared to be a sensor fault. After some investigation, the fault turned out to be a lossy electrolytic capacitor in the DC/DC converter that supplies power to the CCD sensor. Luckily I was able to repair the camera myself. The full investigation and repair story can be found here
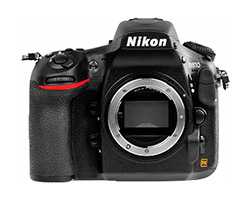
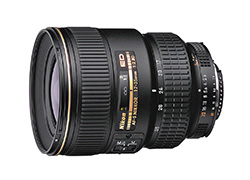
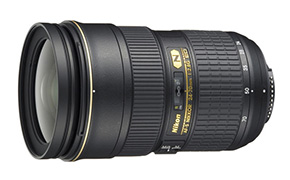
Nikon D810Like many DX users, I waited a long time for the mythical Nikon D400 to appear so that I could upgrade the body but keep my existing DX lenses. Eventually I gave up waiting and bought a full frame Nikon D810 after finding it discounted in a sale at Grays Of Westminster. Just a few weeks later, Nikon announced the DX D500. The 36M Pixel sensor on the D810 is a bit of an overkill for me: I would have been happy with 24M Pixels. The main advantages are better noise performance and wider dynamic range compared to the D200. The FX sensor on the D810 meant I needed to buy another couple of lenses: a 24-70mm FX mid range zoom and a 17-35mm FX wide angle. I managed to find both lenses second hand in mint condition. I also decided to buy a second hand 80-400mm VR zoom since I missed the extra reach provided by my 80-200mm zoom when used with the D200.
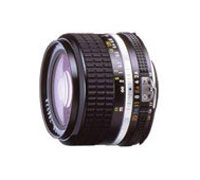
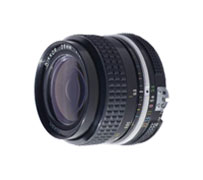
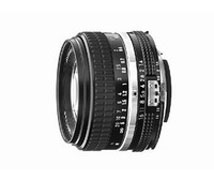
35mm / Digital LensesI have a range of Nikon lenses that cover most situations. Some are older manual focus:-
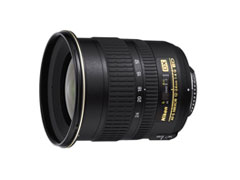
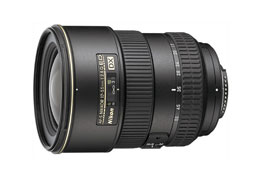
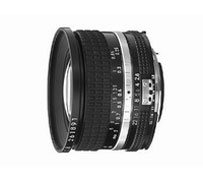
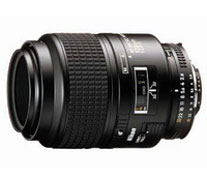
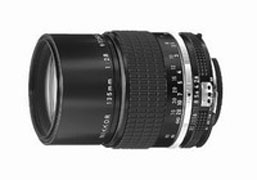
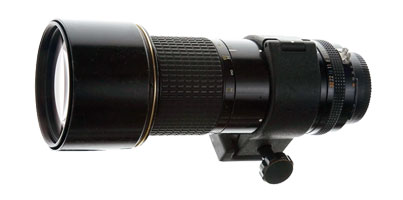
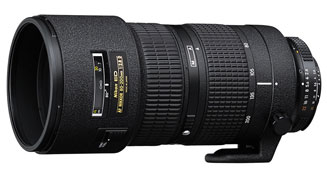
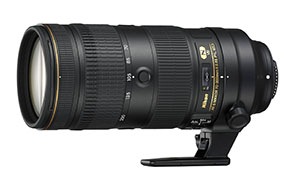
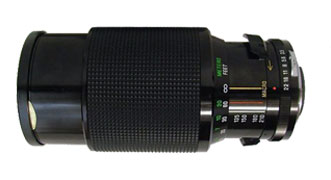
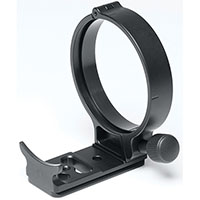
Several of my lenses were purchased second-hand. When people began to move to digital cameras and AF lenses, used MF lenses were being sold for a fraction of the original price. I find the older MF lenses are more solidly constructed and in many cases out perform the AF versions. For most landscape and macro photographs where a tripod is being used, auto-focus is unnecessary and can be a nuisance. The 12-24mm DX lens was bought second hand to give me greater wide angle coverage for the D200. 12mm is equivalent to about 18mm on a 35mm film camera. The 17-55mm DX lens was bought new for the D200. It is equivalent to about 25-80mm on a 35mm film camera. I originally bought the 18-200mm VR DX zoom but exchanged it after I discovered that it suffered from an annoying zoom creep problem when the lens is pointed down. I also found that the 18-200 lens was not very sharp. The 17-35mm lens was bought as used but in mint condition from Calumet in 2016 to use with my FX camera bodies. It has an aperture control ring, so can be used on older Nikon camera bodies such as my FE and FE2. The 24-70mm lens was also bought used in 2016 for my FX camera bodies. Like my 17-55mm DX, this is a G lens, so has no aperture control ring. I bought this in preference to the more recent VR version as it takes 77mm filters and is smaller, lighter, cheaper and sharper. The VR version has an 82mm filter thread, which means my existing polarizer, ND, and Cokin adaptors would not fit. This may not not as sharp as a standard 50mm prime lens, but is more useful for general use, despite being larger and heavier. The 20mm lens was bought second hand from 'Simon Photographic' in MK. A super wide angle lens can be very useful for landscapes with interesting skies. When used with the D200 it is only equivalent to 30mm. It has the same 62mm filter thread as my Bronica lenses so I can use the same filters. I bought the 24mm lens in the recent Jessops closing down sale in CMK(Sept 2007). With 80% off the normal price it was a bargain I couldn't resist. The manual focus lens is much more solid than the AF version. I have owned the 28mm lens from new and probably use it more than any other. The optical performance of the f3.5 lens is excellent and is on a par with the more expensive f2.8 version. I have both f1.4 and f1.8 versions of the 50mm lens. I originally bought the f1.4 new with the Nikon FE. I bought the f1.8 version second hand from Jessops some years later. This was mainly because the minimum aperture on the f1.4 lens is only f16 which restricts the maximum depth of field. As Ken Rockwell points out in his review, the f1.8 lens has superior optical performance. I tend to carry the f1.8 with me in preference to the f1.4. I bought the 105mm macro lens new. I originally intended to buy the older manual focus version second hand but I found a new AF version on special offer. You don't really need autofocus on a macro lens. When I try using it in AF mode I find it often hunts from one end of the focus range to the other and back. This is very annoying when photographing insects. By the time it's managed to focus, the insect has usually flown off. Now only use it in manual focus mode. Optically it is excellent and produces pin sharp images. It uses standard 52mm filters and also makes a great portrait lens. The 135mm lens is a very useful short telephoto. Optical performance is very good. It's small, easy to carry and has the same 52mm filter thread as the 28mm and 50mm lenses. It was bought second hand for just £60. After a few years, the automatic aperture diaphragm would not spring open properly. It was repaired by Grays of Westminster (which cost as much as I paid for the lens) and it's been fine since. The old Vivitar 70-210mm Series 1 zoom was considered as good as many prime lenses of it's day. I bought it new many years ago. It still delivers pin sharp images and has the advantage of a macro mode. Unfortunately the one-touch zoom/focus collar slides down under it's own weight when the lens is pointed downwards. This is a common problem with these lenses. I much prefer separate zoom and focus controls. Another problem with the Series 1 is the lack of a tripod mount on the lens. It is a fairly heavy lens and puts a strain on the camera mount and tripod head. The Nikon 80-200mm lens has excellent optical performance but is heavy to carry around. The lens was bought second hand in virtually mint condition. It is not the silent-wave (AFS) version, so autofocus is not that fast. This is only a problem when shooting moving subjects. This lens has developed a fault with the Auto/Manual switch locking button. The spring beneath the button is broken which allows the control ring to slide around. The lens can end up switching focus modes unintentionally. This is a common fault and a design flaw. My solution was to fit a small neoprene rubber 'O' ring over the button to keep it pulled up in the locked position. As the 'O' ring is flexible, the button can still be pushed down to change focus modes when required. The Nikon 70-200mm fl lens was bought in used, mint condition in August 2019. The big advantage over the older 80-200mm lens is the vibration reduction. It has an electronic diaphragm which means it cannot be used with my older D200 camera bodies. The 300mm lens was bought second hand. The manual IFED version is supposed to have superb performance. My lens tests show that the second-hand one that I bought is not very good. It is quite compact and not too heavy to carry. I suspect it has had a reasonable amount of use in the past because the focus ring, although not sloppy, has less friction than my other MF lenses. It was originally intended for landscape photography so I was not bothered about the lack of autofocus. With hindsight the more expensive AFS version may have been better for use when photographing birds and animals. A 400mm would probably be better in those situations for a film camera. On the D200 it is equivalent to 450mm which is probably about right. The 80-400mm VR lens was bought second hand soon after upgrading to an FX body. It gives more reach than the 80-200mm, so is more useful for aircraft and wildlife photography. It is a bit bulky to carry around but is not much heavier thn the 80-200mm. The lens does show some light fall-off around the edges. I find the VR to be very useful when hand-holding. The original tripod mount on the 80-400mm lens is prone to vibration so I replaced it with the more solid Kirk collar. The Kirk mount is expensive but I found a mint one second hand.
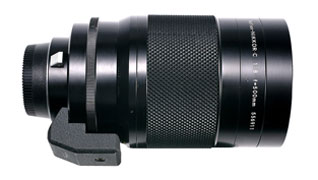
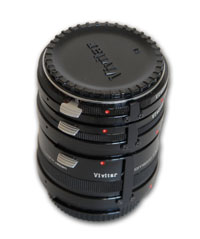
The 500mm reflex lens was a bit of a 'white elephant' and was only used very rarely. It was bought new with the intention of using if for sport and motor racing photography. A conventional 400mm lens would have been much more useful. It's only real advantage is the short length and relatively light weight. The fixed aperture of f8 is restrictive and lens shake is a problem unless a very sturdy tripod is used. The lens comes with a set of four filters that screw onto the rear. As with all mirror lenses, out of focus highlights have a characteristic doughnut shape. I found the lens to be not very sharp. I eventually sold the lens and replaced it with a Nikon 80-400mm VR zoom which is sharper and much more useful. Macro Extension TubesI have a set of Vivitar automatic extension tubes (12mm, 20mm and 36mm). These can be used to allow manual lenses to focus at shorter distances for macro work. The diaphragm coupling allows the aperture to remain fully open when composing and focusing as if the lens were attached directly to the camera body.
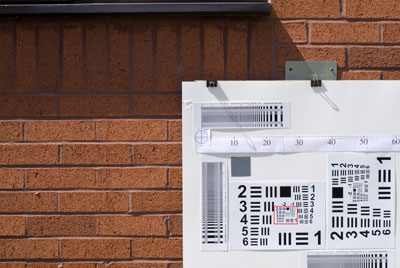
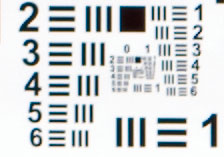
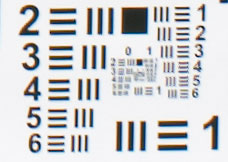
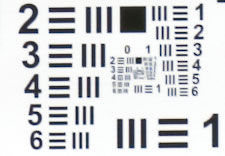
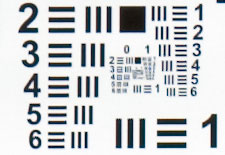
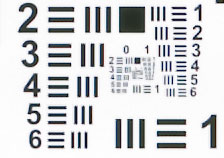
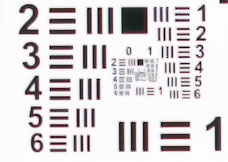
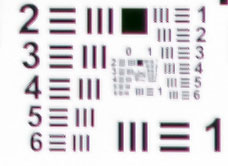
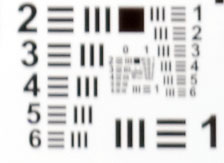
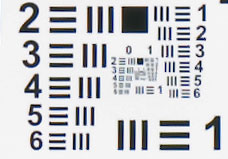
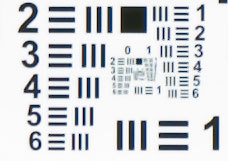
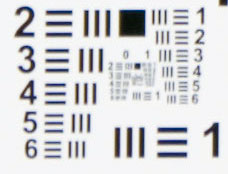
Lens testsTo compare the sharpness of my lenses, I carried out a set of tests as described here: www.normankoren.com. All test images (apart from the 18-200 zoom) were made at 1/125th sec f8 using my Nikon D200 on a sunny day. The 18-200 and 500mm images were taken at 1/15sec f8 on an overcast day. All images were taken using raw mode. No unsharp masking was applied. I used my heavy duty Unilock tripod and cable release. Mirror lock up was used for the 500mm mirror lens to minimise vibration. Manual focus was used in all cases, confirmed using the 'focus LED' in the D200 viewfinder. For all lenses, the lens to target distance was set such that the distance from the center of the image to the edge of the viewfinder was about 59cm. The A4 print of the standard USAF 1951 test target was placed off-center as shown below:-
A magnified crop of the area outlined in red above is shown below for each lens. The results can be summarised as follows:- Not surprisingly, the prime lenses come out on top. The 28mm shows a small amount of chromatic aberration. The 105mm Macro lens is probably the sharpest of the lot. As expected, the 500mm mirror lens is the worst of the bunch. The new 17-55mm DX is not particularly impressive given the cost. The 18-200mm VR is soft - only the 500mm mirror lens is worse. This is why I exchanged it for the 17-55mm. My secondhand Nikon 300mm f4.5 is not very sharp and exhibits a fair amount of chromatic aberration. My old Vivitar 70-210 zoom is suprisingly good.
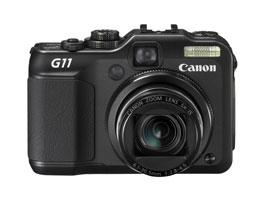
It's worth pointing out that these comparison tests were only carried out at f8. Lenses generally give best sharpness at apertures of f5.6 or f8. At smaller apertures such as f22 or f16, the results appear considerably worse because of diffraction effects. It's only when you carry out sharpness tests at different apertures yourself that you really appreciate how bad diffraction effects can be. The results have put me off using f22 unless it's absolutely necessary. Compact Digital CamerasAfter becoming snow-bound away from my camera gear in the Dec 2009 snow, I decided to buy a digital compact camera I can keep with me. The old Sony compact I ended up using was better than nothing but 3Mpix is not good enough. I looked at both the Canon S90 and the G11. Both cameras have a similar specification and a similar price. The S90 has the advantage of being more compact and so easier to carry in a pocket. It also has a faster f2.0 lens compared to the f2.8 on the G11. In the end I decided on the G11 because it has a slightly longer zoom range and, more importantly, the ability to accept a remote shutter cable for use when mounted on a tripod (useful for sunsets/night shots or macro). The Vari-Angle LCD on the G11 may also prove handy in awkward situations such as shooting near the ground or when the camera needs to be held above the head. Initial impressions after having used the G11 for a while are:-
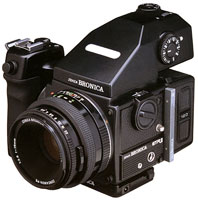
Medium Format Film CamerasFor medium format I use a Bronica ETRSi.
Bronica were acquired by Tamron and the medium format SLR cameras were discontinued in 2004.
Repairs for these cameras are expected to cease in 2011 and spares are no longer available,
so I just hope mine keeps on working.
Although the Bronica is an excellent medium format film camera, I think the Mamiya 6x4.5 would have been a better option.
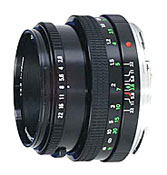
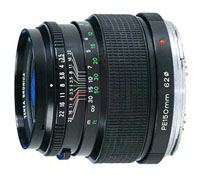
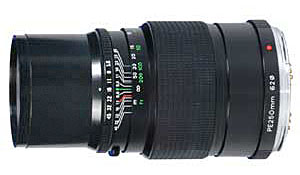
The Mamiya continued to be developed and is still in production. Digital backs are readily available. The ETRSi has interchangeable film backs and gives 15 6x4.5cm frames per 120 roll. It is lighter than the larger 6x6cm SQ camera. This makes it easier to lug around the hills for landscape work. It is also more economical on film since a 6x6cm camera only gives 12 exposures per roll. More frames per roll has another big advantage: changing a 120 film takes time and it's easy to miss the perfect shot if you reach the end of roll just when the sun pops out behind a cloud for a couple of seconds. I think the 6x4.5 aspect ratio is better suited to landscape photography than square format - although it does mean tilting the camera on it's side to use it in portrait mode. You need a sturdy tripod and head to use the camera in portrait mode since the weight is then off-centre. I have a right angle mounting bracket made from thick aluminium angle to avoid this problem. I have three separate film backs for the Bronica. This allows me to switch between B&W, Colour Negative and Transparency film mid-roll. I own a range of prime Zenzanon PE lenses.
The Zenzanon lenses have a built in leaf shutter which gives faster flash sync speeds but increases the cost. The 75mm and 150mm lenses are pin-sharp. The 40mm wideangle lens produces images that are a touch soft around the edges. This was slightly disappointing considering the high cost of the lens when new. Although I've found the 40mm lens very useful for landscape work, it does give converging verticals when used to photograph buildings. The 50mm lens is usually better in such situations. The 50mm and 250mm lenses were bought second-hand and I have not yet assessed their sharpness. I have a metering prism but often find the simple waist level finder is better when it comes to finding a good composition. The prism is detached using a small button on the camera body. It's far to easy to press this button by accident allowing the prism to fall off. This has happened a few times when taking the camera from it's bag. Using the waist level finder means that the image is reversed left-right. You soon get used to it - although it can still be tricky when shooting in portrait mode. The waist level finder can make it easier to spot things like pieces of rubbish that can often be missed when looking through a normal viewfinder. Exposure MetersI sometimes use a separate exposure meter. This was the only way to make exposure measurements for the Bronica before I bought a metered prism. Using an external meter means that you need to remember to adjust the exposure when using filters on the camera. For example, an orange filter requires +1 stop, red +2 stops, polariser +2 stops.
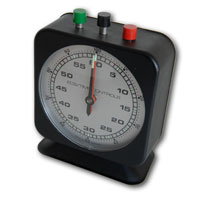
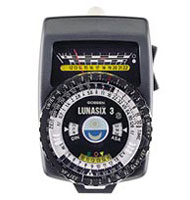
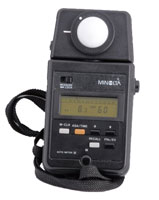
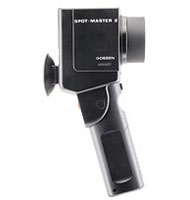
The analogue Gossen Lunasix III is old but sill very effective. It's quick and simple to use and has the advantage of both incident and reflected light measurements. I think I actually prefer the analogue readout to digital. Many digital meters display intermediate shutter speed and aperture readings that you can't actually set on the camera. Unfortunately the Lunasix 3 doesn't handle spot metering or flash. The 'Lab' attachment allows the Lunasix to be used as a darkroom exposure meter. I used this when I had my Durst M305 enlarger. The measuring cell is placed at the required location in the projected negative on the level of the photo paper. Then, the corresponding density value can be measured. By measuring several image sections, it is possible to make a contrast reading to measure the paper graduation. The digital Minolta III meter was bought second-hand. It has an internal switch that operates when the incident light dome is attached. On my device the switch contacts are unreliable which can result in an incorrect reading. It also worries me that there is no on-off switch. It does turn itself off after a timeout period but I suspect there is still a small drain on the battery. I usually remove the battery when it's not in use. The Gossen Spotmaster doesn't get used as often as it should because it is bulky to carry. The Spotmaster is supposed to make it easy to use the zone system, but I find it fiddly and slow to use. It is accurate and does handle flash. TripodsI have five tripods:- A Velbon SEF-3, a small portable (but not very sturdy) Slik 450G, Unilock equivalent versions of the Benbo Treker and the larger Benbo 1. I also have a carbon fibre Gitzo Mountaineer GT3541. The Slik 450G collapses to just 300mm and is very easy to carry. It is better than nothing when you don't want to lug a full size tripod when going for a walk or on holiday. It is a bit wobbly when fully extended to 865mm but is often good enough for a compact digital camera or even an SLR as long as it's not fitted with a heavy lens.
The Velbon SEF-3 is not particularly sturdy considering it's weight. That may be because the legs are made from open 'U' section aluminium rather than a closed tube. It has a pan and tilt head which I'm not keen on, although it is made from solid diecast alloy. The head does not allow the platform to tilt down below the horizontal which means adjusting the legs to get the camera horizontal if the ground is not level. It does have the ability to set each of the legs at different angles which can be useful. The center column is in two sections that can be unscrewed to allow the camera to be set close to the ground.
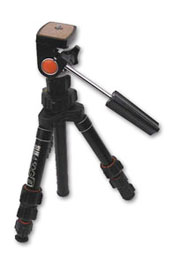
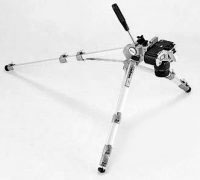
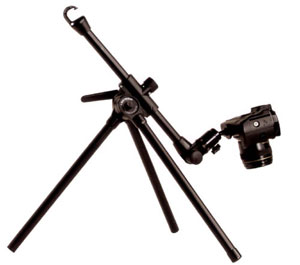
The Benbo style tripods are very versatile. The one shown below is the original Benbo. The Unilock version is similar in design.
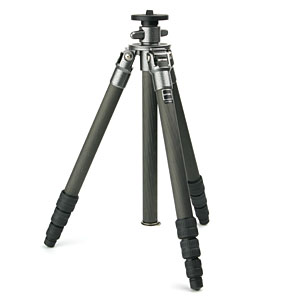
The larger Benbo tripod is very solid but quite heavy. I wouldn't want to carry it more than about a mile. The Trekker is light enough to carry longer distances and is sturdy enough for medium format as long as its not fully extended or very windy. The four section light weight carbon fibre Gitzo Mountaineer GT3541 was expensive but is ideal for use on trips involving air travel.
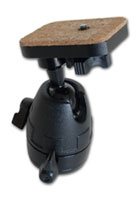
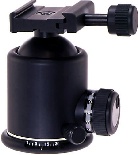
The Gitzo has the advantage of being relatively sturdy while still easily fitting in a suitcase once the head is removed. Although the light weight makes it ideal for travel, it did actually blow over in strong winds while in Iceland. Luckily, my camera was not fitted at the time. Annoyingly, the screw in rubber feet were not tightened properly when they left the factory and I managed to lose one on the very first trip when in Iceland. Information on the web indicates that this is a common problem with Gitzo tripods. When I phoned Speedgraphic, who supplied the tripod, they sent me a replacement foot free of charge and it arrived the next day. I have always found Speedgraphic to provide excellent service and really fast delivery. I also sent Gitzo (Bogen Imaging) an email complaining about the problem and they sent me a complete set of three spare feet too. I have now applied loctite thread lock to all the feet to prevent the problem happening again. Unfortunately, none of my tripods or heads have a spirit level or provision to attach one. These can be very useful when there is no vertical or horizontal reference. For my 35mm cameras I use a spirit level that attaches to the camera hot shoe. The Bronica has no hot shoe on the main body so this solution is not possible. I eventually found a way to attach a level to the quick release base plate using a piece of aluminium. Tripod HeadsMy preference is for ball-heads rather than pan and tilt. The original Unilock ball head I bought to use with the smaller trekker tripod is ok for most 35mm kit but not really solid enough for medium format or longer lenses.
The ball is too small and tends to 'creep' under the weight of my medium format camera when being used on it's side in portrait mode. The control that locks the ball has a head shaped like a lever rather than a circular knob. This makes it too easy to accidentally knock the ball loose when carrying the tripod with a camera attached. The camera can then drop suddenly under it's own weight. I eventually bought an expensive but very solid Arca-Swiss Monoball B1 to use on the larger Unilock and Gitzo tripods.
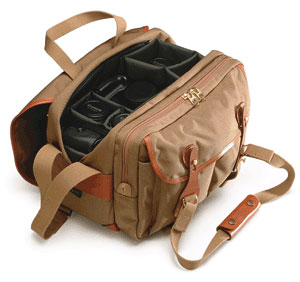
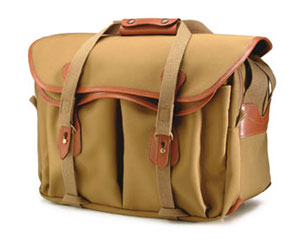
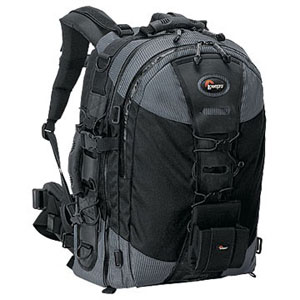
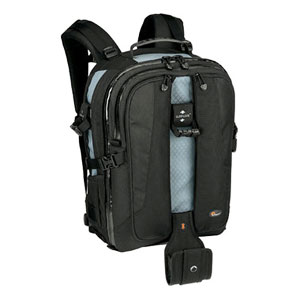
This has an adjustable friction control and a ball that is slightly elliptic rather than spherical. This means that when the ball is released to allow the camera to be tilted, it does not suddenly become completely loose allowing the camera to drop. It uses a quick release clamp which meant buying a number of base plates - one for each camera body and for the longer lenses that have built-in tripod mounts. The base plates are very expensive considering they are nothing more than a black painted piece of extruded aluminium with a 1/4" bolt in the middle. Annoyingly the Arca-Swiss head developed a problem after a couple if years - it would not release fully unless pushed down hard on the top. Since Arca have no service center in the UK, I had to send it to France for repair. Luckily it was carried out free of charge since it turned out to be a known production fault with the 'calumets' that clamp the ball. Upon return from Arca-Swiss, the repaired head worked fine for another couple of years. In 2007 the same fault re-appeared. I attempted to contact Arca-Swiss by email to arrange another repair but received no response. Eventually I decided to dismantle the head myself. A set of heavy duty circlip pliers is required for this job. I discovered the diameter of the nylon cup that clamps the ball had expanded over time. The excessive friction between the cup and housing prevents the ball releasing properly. I managed to reduce the diameter of the cup using a fine sharp file followed by wet-and-dry abrasive paper and water. The head now works just as it did when new. Bags and BackpacksLike tripods, it's impossible to find the perfect bag and you usually end up with several. Having a number of bags is pretty much essential when you have a collection of different kit such as 35mm, digital and Medium Format. I started out with shoulder bags but eventually transitioned to using backpacks as the weight of my gear increased. Shoulder bags have the advantage that you don't need to put the bag on the ground to take your kit out. This can be very handy if you are wading in water with your wellies or if there is mud on the ground. When using a backpack, it is a good idea to carry a plastic sheet to keep it out of the mud when you put it down. The Billingam shoulder bags are very well made and should last a lifetime. Always buy one bigger than you think you will need. I usually find the 335 to be too small, even for 35mm kit. In addition to my two Billingham bags, I have another couple of shoulder bags made from padded ballistic nylon. I've had them for many years and they are both looking a bit worn and tatty. One of these still holds the kit I use when shooting infrared film - changing bag, filters etc. I used to use the Billingham 445 for my Medium Format gear, but found it became too heavy for one shoulder. I bought an add-on backpack harness to distribute the weight but it did not work well. The 445 is not designed as a backpack: The lack of ventilation between the bag and your back means your back quickly ends up drenched in sweat. I now use a second-hand Lowepro Photo Trekker AW II for Medium Format. The Lowepro Photo Trekker AW II backpack is well made, comfortable to carry and can hold a lot of kit. However, it is a bit too big to take on an aircraft as hand luggage. The sternum support takes up a lot of room and cannot easily be tucked away when the pack is stowed. It also has too many loose straps that can easily get caught up and snagged. I use the Lowepro Vertex 200 backpack for my digital SLR and lenses. This is slightly smaller than the Photo Trekker which means it can be taken as hand luggage when flying. It just fits in the overhead luggage compartment on an aircraft.
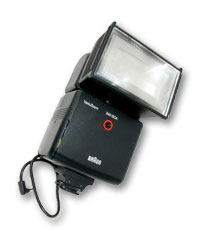
FlashI have three flash guns although they are only rarely used.
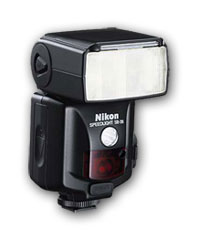
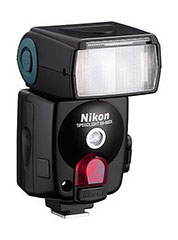
The Braun 340 SCA Vario-zoom only allows apertures of f4 or f8 when set to automatic exposure mode. It has no TTL metering capability. The Nikon SB-28 was bought second hand. It is more powerfull, has a shorter flash duration and gives more flexibility than the Braun. It provides TTL metering when used with the F100. Unfortunately TTL metering cannot be used with the D200. I was given the Nikon SB-80DX. Like the SB-28, it will not work in TTL mode with my D200. It is still useful as a second light source for things like water droplet photography. Filters
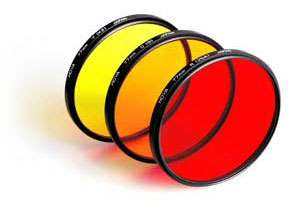
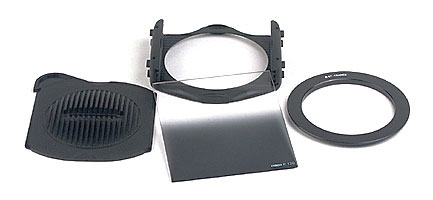
When using a digital camera, the most useful filters are a polariser and a selection of grad-grays. A neutral density filter can also be useful in providing slow shutter speeds when shooting waterfalls etc. This is especially true when using a camera such as the D200 that does not allow ISO speeds below 100. I also use a 77mm Hoya ND8 filter that reduces the light level by 3 stops. The Canon G11 compact has a selectable 3 stop ND filter built in - a really great idea. It's a shame it doesn't have a built in a polarising filter too. I use filters quite often when using film. For B&W film, an orange or red is useful to darken blue skies. A red filter can cause the shadows to block up - especially in green foliage. I used to think that this was down to the spectral characteristics of the TTL meter in the Nikon FE & FE2. However, the indicated shutter speed does decrease by 2 stops when the filter is placed on the lens as expected. This is consistent with my hand-held meters when the same filter is placed over their sensor. It may be that the B & W film I use is slightly less sensitive to red light. To compensate I now increase exposure by an extra 1 -> 2 stops in addition to the 2 stops indicated by the meter. A combination of a polariser and red filters can be useful for creating dramatic very dark skies. My lenses are normally fitted with Skylight or UV filters to protect the front element. I have a few acrylic Cokin P-series filters including a couple of warm-up filters, a diffuser and a range of different strength soft and hard graduated gray.
I bought a set of 100mm Cokin Z-Pro grad gray filters to use with my newer Nikon zoom lenses. The Cokin P-series filters are too small for use with lenses with 77mm filter threads. The Z-Pro filters are not cheap - a set of three plus holder costs around £100 plus another £18 for a 77mm adapter ring. Lee filters are considered the best, but they are even more expensive. Warm up filters need to be used with care. Unless it's early morning or evening, they can result in unnatural looking colours. I found this to my cost after using one on a trip to Tuscany when photographing a poppy field during the daytime. The resulting colours on the transparencies look terrible. I would rather make the adjustments at the printing stage.
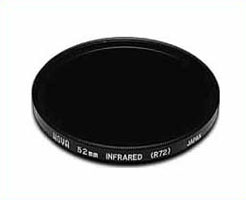
I use Hoya R72 filters for infra-red. The R72 filter is completely opaque to visible light, so the scene has to be composed and focused before the filter is attached. I have both 52mm and 62mm sizes. 62mm is required for the Nikon 20mm lens. I hoped the 62mm filter would allow me to use infrared film in my Bronica medium format camera. Unfortunately it is now difficult to buy infrared film in 120 roll sizes. Rollei (now Efke) are the only manufacturer producing 120 size infrared film (www.silverprint.co.uk). |
||||||||||||||||||||||||||||||||||||||||||||||||||||||||||||||||||||||||||||||||||||||||||||||||||||||||||||||||||||||||||||||||||||||||||||||||||||||||||||||||||||||||||||||||||||||||


|
||||||||